Docs / Datasets & Experiments
Datasets & Experiments
Get hands-on with Evaligo in under 10 minutes. You'll create your first project, import a dataset, configure prompt variants, and run an experiment to see immediate, actionable results.
This guide walks you through the complete workflow from setup to results analysis. By the end, you'll understand how Evaligo helps you systematically improve AI quality and catch regressions before they reach production.
Whether you're evaluating LLM responses, comparing prompt variants, or testing model performance across different use cases, this quickstart establishes the foundation for all your future AI evaluation workflows.
Prerequisites
Before starting, ensure you have the following ready to maximize your success with this tutorial.
- 1
Evaligo Account Sign up for a free account at evaligo.com if you haven't already.
- 2
API Credentials Have your OpenAI, Azure, or AWS Bedrock API keys ready (optional for this tutorial).
- 3
Sample Data Prepare a small CSV or JSONL file with 10-20 test cases, or use our provided sample dataset.
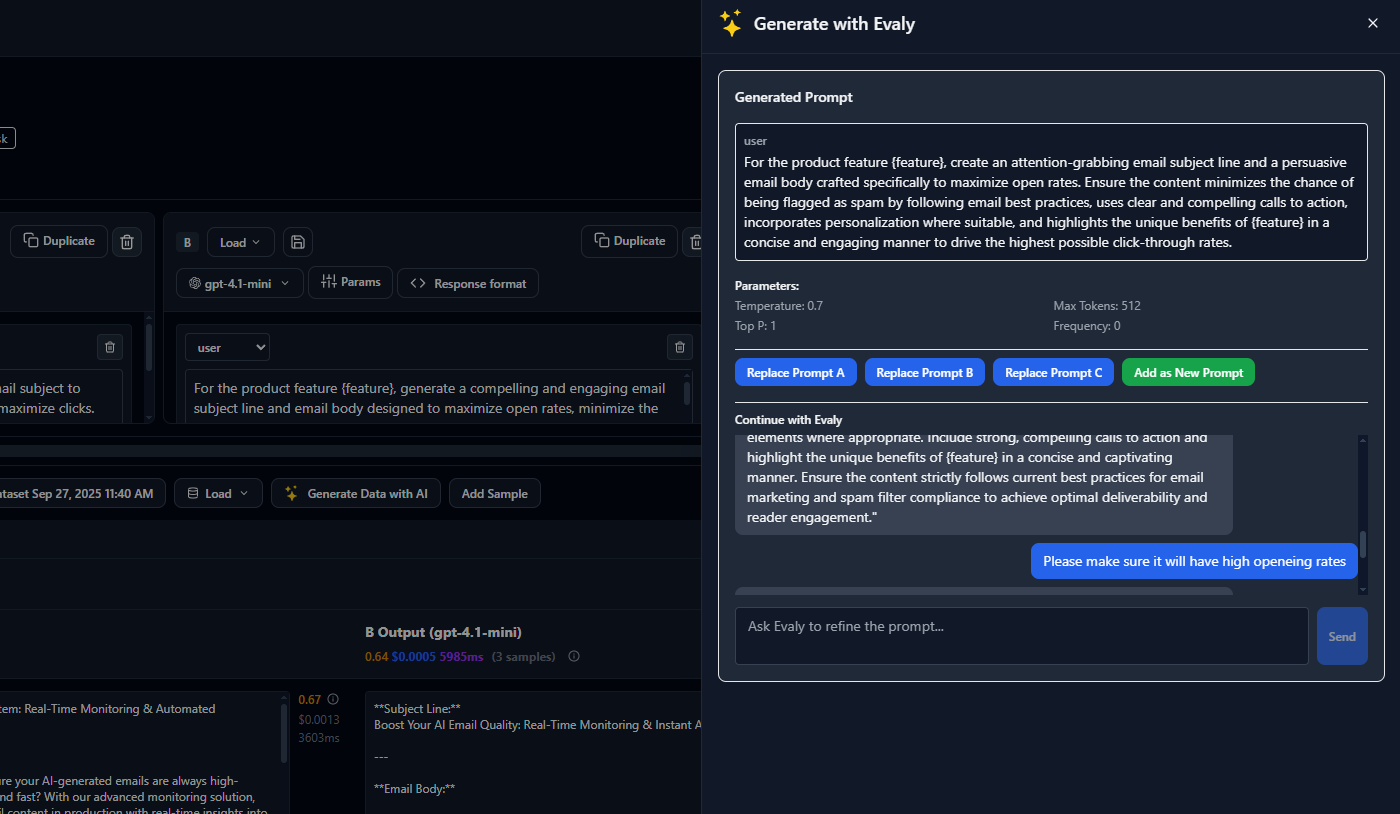
Generate Test Data with Evaly Co-Pilot
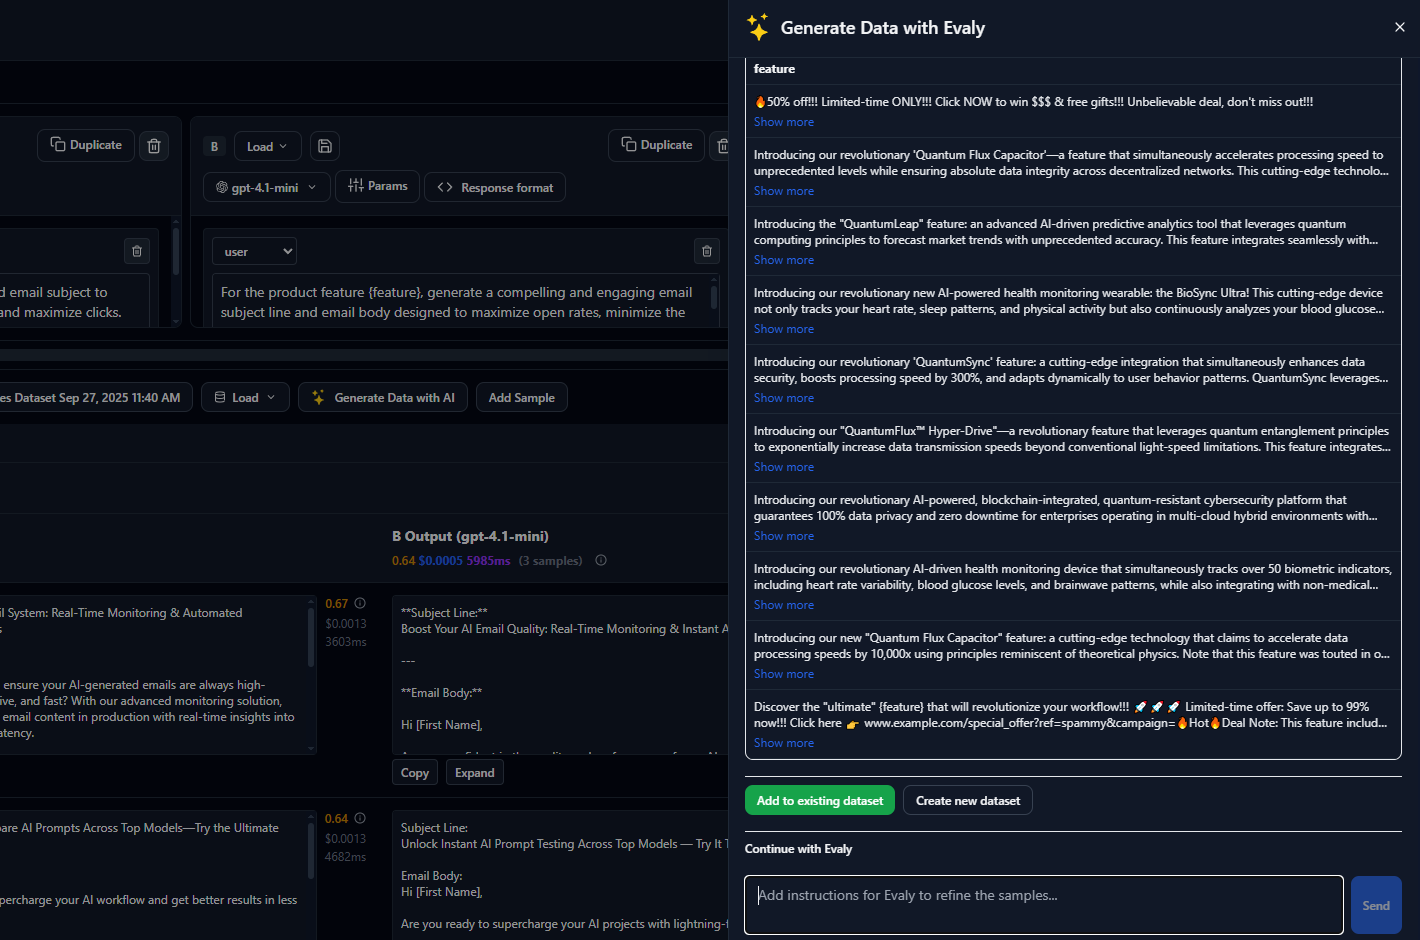
AI-Guided Prompt Generation
Step 1: Create Your First Project
Projects in Evaligo organize all your experiments, datasets, and evaluations around a specific use case or application. Think of it as a workspace for a particular AI feature you're building.
Navigate to the dashboard and click "New Project". Name it something descriptive like "Customer Support Bot Evaluation" or "Content Generation Testing". Add a brief description of what you're planning to evaluate.
The project serves as the central hub where you'll track prompt performance, dataset quality, and evaluation results over time. This organization becomes invaluable as your evaluation workflows grow in complexity.
Step 2: Import and Configure Your Dataset
Quality datasets are the foundation of reliable AI evaluation. Your dataset should represent real-world inputs your AI system will encounter, with expected outputs or reference answers when possible.
Upload your CSV or JSONL file using the dataset import wizard. The system will automatically detect columns and suggest mappings for input fields, expected outputs, and any additional metadata you want to track.
During import, you'll map your data columns to Evaligo's standard fields: inputs (what gets sent to your AI), references (expected outputs), and any custom metadata. This mapping ensures consistent evaluation across all your experiments.
If you don't have a dataset ready, you can start with our sample "Customer Inquiry" dataset that includes varied support questions and reference responses across different complexity levels.
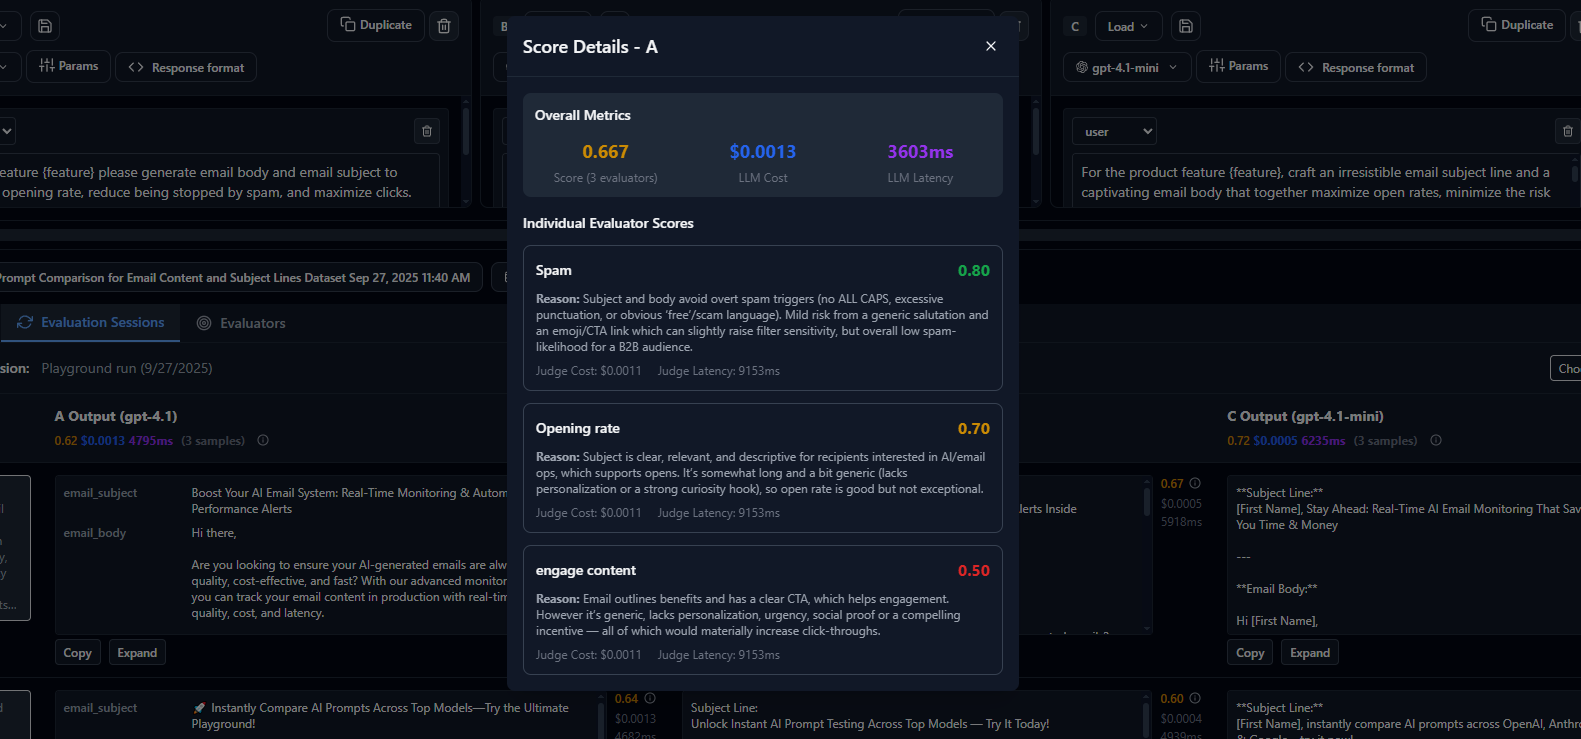
Evaluator Scores Breakdown
Step 3: Configure Prompt Variants
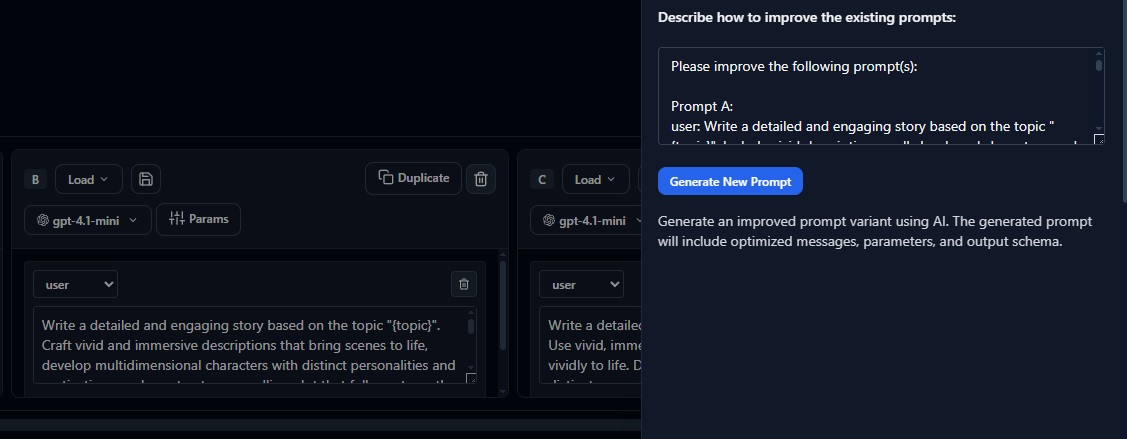
Now you'll create different versions of your prompt to test which approach works best for your use case. Even small changes in wording, examples, or structure can significantly impact AI performance.
In the Experiments section, create at least two prompt variants. For example, a "Direct" version that asks questions straightforwardly, and a "Chain-of-Thought" version that encourages step-by-step reasoning.
Select your preferred model provider (OpenAI GPT-4, Claude, or any supported LLM) and configure parameters like temperature, max tokens, and any system messages. Keep settings consistent across variants to ensure fair comparison.
Step 4: Run Your First Experiment
With your project, dataset, and prompt variants configured, you're ready to run your first experiment. This is where Evaligo's power becomes apparent as it systematically tests each variant against your entire dataset.
Click "Run Experiment" and watch as Evaligo processes each test case through your prompt variants. The system tracks response quality, latency, token usage, and any errors that occur during processing.
Depending on your dataset size and model speed, experiments typically complete within 2-5 minutes. You'll see real-time progress updates and can monitor individual responses as they're generated.
Video
Step 5: Analyze Results and Next Steps
Once your experiment completes, you'll land on the results dashboard where you can compare prompt variants side-by-side. Look for patterns in response quality, consistency, and any edge cases where certain variants excel.
The summary view shows aggregate metrics like average response length, token consumption, and success rates. Drill down into individual responses to understand why certain variants perform better for specific types of inputs.
Use the insights from this first experiment to refine your prompts, adjust model parameters, or expand your dataset with additional edge cases you discovered during testing.
Analyze Individual Responses
Sample Code Integration
Once you're satisfied with your prompt performance, integrate Evaligo into your development workflow using our SDK. This enables continuous evaluation as your application evolves.
// Install the Evaligo SDK
npm install @evaligo/sdk

// Initialize with your API key
import { Evaligo } from '@evaligo/sdk'
const client = new Evaligo({
  apiKey: process.env.EVALIGO_API_KEY
})

// Run evaluations programmatically
const experiment = await client.experiments.create({
  projectId: 'your-project-id',
  datasetId: 'your-dataset-id',
  variants: [
    { name: 'baseline', prompt: 'Answer this question: {{input}}' },
    { name: 'enhanced', prompt: 'Analyze and answer: {{input}}' }
  ],
  model: { provider: 'openai', name: 'gpt-4' }
})

// Monitor results
const results = await client.experiments.getResults(experiment.id)
console.log(`Baseline accuracy: ${results.variants.baseline.accuracy}`)
Next Steps
Congratulations! You've completed your first end-to-end evaluation workflow. You're now ready to explore Evaligo's advanced features and integrate evaluation into your AI development process.